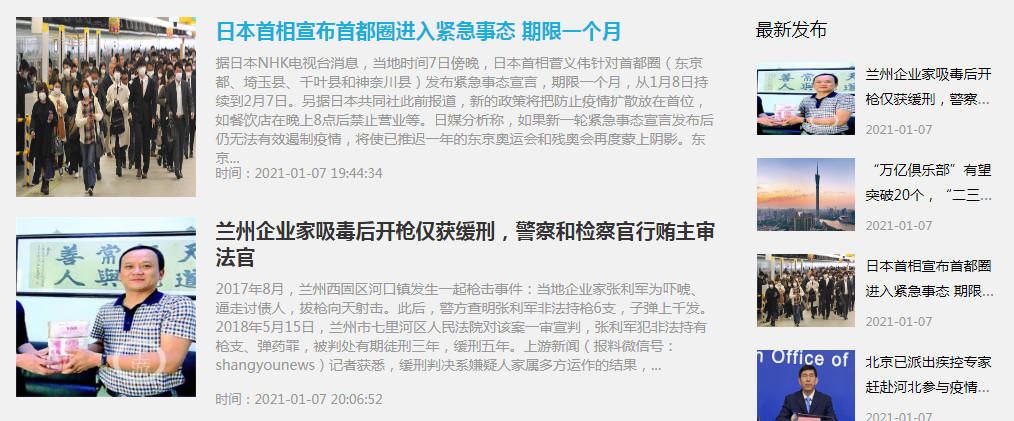
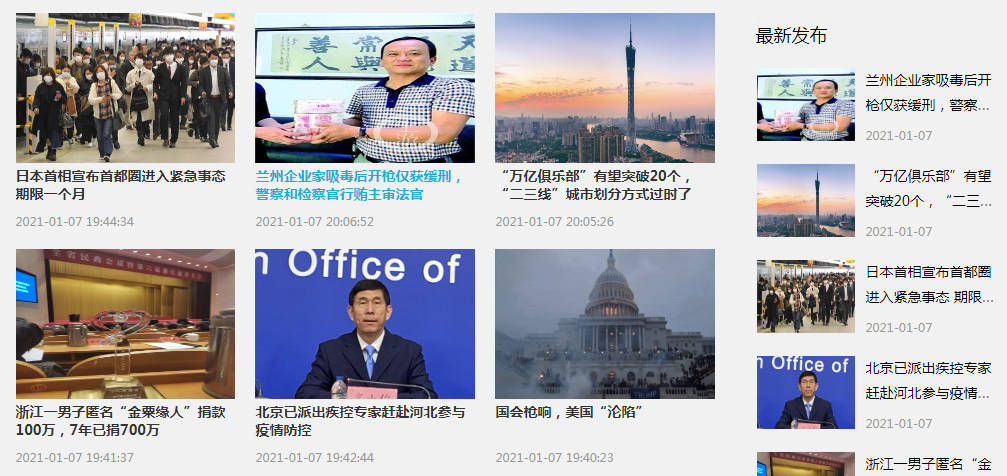
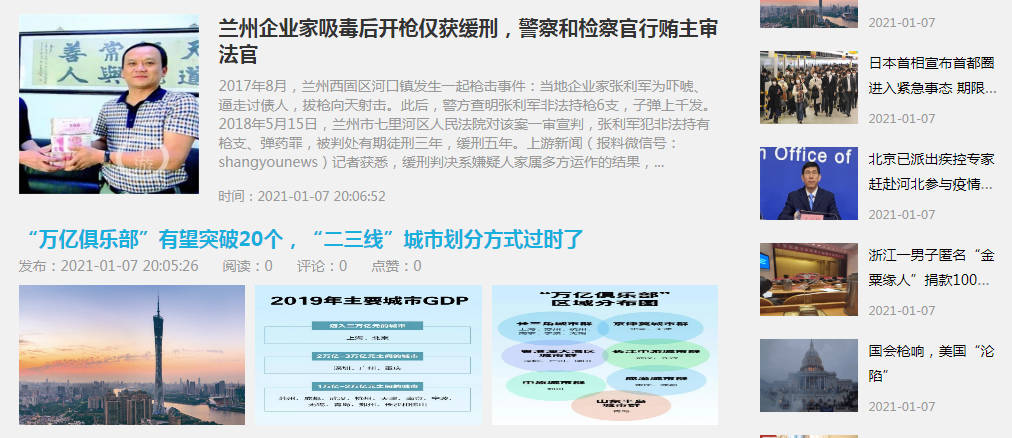
这一篇我们来了解模板的配置功能,配置功能的使用可以让模板数据搭配更灵活。比如说一些视觉上的配置了,数据列表的配置了等等。
下面,我们使用简单的例子来了解下rpcms模板配置功能。
一、添加配置文件
在模板文件夹中创建setting.php和default.php,其中setting.php是模板的配置表单,default.php是模板配置的初始化数据。详情可看《模板制作-配置文件的使用》。
本篇我们来制作一个动态设置的列表展示方式和页面背景颜色,通过这两个配置来了解模板配置的使用。
setting.php我们写入如下代码:
<?php if (!defined('CMSPATH')){exit('error!');}?>
<div style="width:100%;background:#fff;position: relative;">
	<form class="me_form" action="" method="post">
		<div class="me_input">
			<label>首页列表</label>
			<label><input type="radio" name="listStyle" value="1" {php}echo (isset($config['listStyle']) && $config['listStyle']=='1') ? 'checked' : ''{/php}>图文列表</label>
			<label><input type="radio" name="listStyle" value="2" {php}echo (isset($config['listStyle']) && $config['listStyle']=='2') ? 'checked' : ''{/php}>卡片列表</label>
			<label><input type="radio" name="listStyle" value="3" {php}echo (isset($config['listStyle']) && $config['listStyle']=='3') ? 'checked' : ''{/php}>智能图文</label>
		</div>
		<div class="me_input"><label>背景颜色</label><input type="text" name="bgColor" value="{php}echo isset($config['bgColor']) ? $config['bgColor'] : ''{/php}"></div>
		<input type="hidden" name="sendpost" value="1"/>
		<button type="sumbit" class="rp_btn success sendpost">保存设置</button>
	</form>
</div>
default.php的数据格式为PHP数组,例如本篇教程中的初始化配置数据:
<?php
return array(
	'listStyle'=>1,
	'bgColor'=>'#f1f1f1',
);
二、在模板中调用
模板配置数据无需手动获取,系统在加载模板的时候会自动获取其配置数据,并赋值给前端,可通过{$tempConfig[数据名称]}获取。
这里,我们修改下header.php,在head标签中加入css,并调用模板配置的数据。
<style>
body{background:{$tempConfig['bgColor']|default='#fff'}}
</style>
接着,我们完善下首页的列表数据
<div class="s2">
	<div class="s2_left">
		{if $tempConfig['listStyle'] == 1}
			{include:list_style_1}
		{elseif $tempConfig['listStyle'] == 2}
			{include:list_style_2}
		{else}
			{include:list_style_3}
		{/if}
		<div class="pages">{$pageHtml}</div>
	</div>
	<div class="s2_right">
		<ul class="sidenews">
			<h2>最新发布</h2>
			{$newLogs=newLogs(10)}
			{foreach $newLogs as $k=>$v}
				<li>
					<i>{:thumb($v)}</i>
					<p><a href="{$v['url']}" title="{$v['title']}">{$v['title']}</a></p>
					<span>{$v['createTime']|strtotime|date='Y-m-d',###}</span>
				</li>
			{/foreach}
		</ul>
	</div>
</div>在class="container"的div中追加一个.s2的模块,其中我们根据不同的$tempConfig['listStyle']来调用不同的数据列表模板,这里我们制作了三套模板,由于内容长度问题就不一一展示了,在本专题完结后,制作的模板会发布到应用中心供同学们下载参考。
三、看看效果
1、图文列表

2、卡片列表

3、智能图文

本专题,完结!!!


发表评论
评论已关闭,请移步论坛发表,立即前往